
| Some plants only need the right outdoor environment to make seedlings for you. |
| ABOUT US START IDEAS DO LESS USEFUL PLANTS PROJECTS VIEWS RESOURCES TOPICS |
|
|
|
|
|||
|
If you have no interest or time for growing plants from seed indoors, you can still grow low-cost seedlings for your garden with very little effort. All you need are a few seed-producing plants and a bed of gravel; Father Time and Mother Nature will supply the seedlings. The Discovery The gravel seed bed method has been used for eons. I discovered it by accident when I made a gravel path through a damp, shady area of my garden. Two months later, I noticed seedlings of nearby columbine (Aquilegia hybrida 'Nora Barlow') and forget-me-not (Myosotis sylvatica 'Blue Bird') growing in the gravel path. I scooped the seedlings out with a shovel, gravel and all, and moved them to the planted areas. I watered them every so often during the next month but otherwise didn't pay much attention. Some didn't make it, but many did. I'd done very little work and had many new plants to show for it! Since then, I've rescued and replanted well over a hundred seedlings from gravel beds around my property. With them I've filled out planted areas for free, with little work, and with an impressive success rate despite lackadaisical aftercare. Creating Gravel Beds You don't have to set aside a special area for a gravel seed bed, though you could if you have the space. A separate "nursery room" for seedlings could be hidden from visitors and would keep things more tidy, which might help you relax in the garden if you're the kind of gardener who's always noticing what has to be done next. Since I garden in a small urban lot where every square foot counts, I've created gravel paths and patios that double as seed beds. These fit the informal look of my garden, and I don't mind green patches among the stepping stones. I also find it convenient to grow my seedlings near the beds into which they'll be moved. Sprinkle some soil in your gravel to encourage seedlings. My seedlings have done much better in "dirty" gravel because the roots feed on it and it holds water. When to Transplant Seedlings How to Transplant Seedlings If they're moving to bare soil, I use the technique my grandmother taught me:
If the seedlings are moisture-loving (i.e. came from the moist side of the house), I usually spread a one-fourth to one-half inch layer of wood chips around their bases after transplanting. This deters weed seeds in the soil from germinating and competing with the little plants, and it also keeps their fragile roots moister and cooler. If the seedlings are moving from dry sandy beds, I usually top them off with a similar depth of sand or gravel, which will protect their roots but preserve good drainage. Whether they germinated in a wet or dry area, I make sure each plant is thoroughly watered after planting and mulching. I hang the end of the hose a couple of inches above the ground and water in a circle around the plant's center, until the ground around it is squishy, stopping before the plant starts swimming. If the plant starts to float, I take away the water and push the plant down firmly with my foot to reseat it. I soak new transplants in this way every few days for the next couple of weeks, more often if I notice they're extremely dry and less often if we get a good rain. After that, I only water in periods of drought, which is roughly two-and-a-half weeks without rain in these parts. Seed Sources My "seed plants" are planted in beds adjacent to the gravel areas. You could also plant a few seed plants directly into the gravel. (Actually, you'd want to plant them in the soil under the gravel, then water them enough to make sure they establish well and produce a large crop of seeds.) If I couldn't find seed plants or didn't want to pay for them, I'd buy a packet of seeds and scatter them on the gravel. I'd try to pay attention to when they'd normally release their seeds, and I'd scatter mine at that time of year. More realistically, I might just scatter them when I'd bought them, then if they didn't grow, try again with a new packet giving more consideration to when they should be scattered. I would not, however, scatter them before the last spring frost or within a month of the first fall frost unless the seed packet or catalog instructed me to do so. Many of my plants originally came from seeds sold by Thompson and Morgan, and most were labeled "Easy to Germinate" in their catalog. Surprising Seedlings Many cultivated varieties (cultivars) don't come true from seed; that is, they produce seedlings of the species rather than the cultivar; these new plants vary from their parent in flower color and shape, leaf color, and other characteristics. Others cannot reproduce by seed. I've seen several different results from seed propagation. My butterfly bush (Buddleja davidii 'Black Knight') produced several seedlings, all of which had the light purple flowers of the species rather than the striking dark purple blooms of that variety. On the other hand, my columbine (Aquilegia hybrida 'Nora Barlow') produced many seedlings, all of which carried the same blue-green leaves and spurless, yellow and red flowers of that variety. Every so often, one of the seedlings from my Musk Mallow (Malva moschata alba 'Pirouette') sports a white center instead of the parent plant's light pink centers. Encouraging your plants to self-sow can add a new dimension of mystery and anticipation to your gardening experience. If you like surprises, it can be fun to watch what new plants your existing plants produce. Gravel Maintenance My gravel beds were between three and four inches deep when I first laid them. After four or five "harvests", I added another inch of gravel in places where seedlings commonly sprout. Before that, I merely smoothed out the surface of the gravel after digging up seedlings, which slightly lowered the surface of nearby areas but otherwise erased any traces of disturbance. Clearing the gravel paths and patios of seedlings in spring and fall coincides nicely with good replanting times for many species. My main seedling crop is forget-me-nots, which I need to replenish often as they're biennial and thus tend to disappear after two years, so I schedule my digging based on their calendar. I usually "harvest" seedlings in early spring after the ground thaws but before the forget-me-nots bloom, then again in mid-fall after the summer-sown seedlings have grown large enough to transplant but before fear of frost would keep me from moving them. However, I don't stick to a firm schedule, and I've been known to dig up a seedling that brushed my bare toes once too often and plunk it into its permanent destination, disregarding the date. To Stop Propagation If you decide you no longer want to encourage seedlings, you'll need to replace the gravel with some other medium. There are a couple of ways to do this:
In my zone 4 garden, I use several gravel beds that have different environmental conditions. I have been able to encourage many species to self-sow in each. Here's a brief list for each area: Not every plant will propagate in gravel, but I suspect that many more than these will, given encouragement, produce enough extra plants that you can save significant money and energy. So if you're sick of the indoor potting rituals, why not take a break? Set up a gravel seed bed, then relax in your garden while Nature and Time supply you with seedlings. |
For More Information: Lewis Hill wrote the best book I've found on propagation. The diagrams hardly need text, they're so self-explanatory.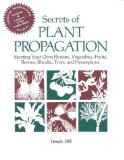 Related LessLawn articles: |
||
|
Thanks for visiting http://www.LessLawn.com! All site contents © 2001-2013 Evelyn J. Hadden, except where noted. All rights reserved. |